Smart Structural Designs for Your Basement Remodel

Subterranean square footage represents one of the most versatile, high-potential assets in modern residential architecture. For many property owners, an unfinished basement begins as an uninviting space of exposed masonry, overhead wiring, cold perimeter walls, and noisy mechanical equipment. Transforming this lower level into an upscale extension of the home—whether as an executive office, entertainment suite, or acoustic media room—requires far more than hanging standard drywall and laying floating vinyl planks over cold concrete.
A high-performing remodel demands a rigorous, structural-first methodology. Because basement enclosures exist below grade, they are continuously subjected to immense lateral earth pressures, shifting groundwater tables, ambient humidity, and thermal differentials that do not affect above-ground living areas. Furthermore, the structural framing and primary utility distribution networks that support the entire residence overhead converge within this single envelope. Overlooking these baseline realities in favor of superficial cosmetic upgrades invites chronic problems, from concealed structural movement and moisture entrapment to claustrophobic ceiling heights and poor indoor air quality.
To achieve lasting longevity and superior daily comfort, homeowners must approach their conversion from the outside inward and from the slab upward. Prioritizing engineered wall stabilization, moisture barrier integrity, clear-span load redistribution, consolidated utility pathways, and balanced ventilation delivers a clean architectural canvas. When these structural and mechanical fundamentals are resolved first, cosmetic finishes perform as intended, permanently elevating the appraisal value, durability, and livability of the entire home.
Conduct a Hydrostatic Pressure and Lateral Load Audit

Subgrade perimeter walls carry the load of your entire home while withstanding lateral forces from adjacent soils. Saturated backfill, frost heave, and poor exterior grading exert substantial inward pressure against masonry blocks and poured concrete. Before framing interior walls, you must perform a thorough structural assessment to verify that the envelope is stable.
- Inspect wall planes for differential deflection: Hairline vertical shrinkage cracks are normal in cured concrete, but stair-step joint cracks or horizontal bowing along the bottom third of a wall indicate progressive shear failure under lateral soil load.
- Assess exterior drainage geometry: Confirm that ground soil slopes away from the foundation perimeter at a minimum pitch of one inch per foot across ten feet. Downspouts should discharge rainwater six to ten feet away from foundation footings into solid drainage pipes.
- Evaluate soil-structure interaction: Expansive clay soils swell during wet seasons, generating outward hydrostatic pressures that necessitate permanent structural remediation rather than cosmetic patching or superficial hydraulic cement coatings.
When structural inward movement exceeds one-third of an inch, simple surface caulking fails to halt displacement. In these situations, consulting an experienced foundation contractor is essential. A structural specialist will determine whether carbon-fiber reinforcement straps or structural steel uprights anchored to floor joists and footings are required to halt wall deflection before framing starts.
Restore Sub-Slab Weeping Tiles and Trench Footing Drains
Water penetration remains the chief hazard for any finished subterranean room. High water tables force groundwater through cold joints, hairline floor cracks, and the cove joint between the slab and perimeter walls. A dependable drainage setup is mandatory to capture subgrade runoff before moisture reaches finished assemblies.
- Diagnostic camera scoping: Before building out perimeter framing, feed fiber-optic cameras through weeping pipes to detect silt accumulation, crushed pipe sections, and iron ochre buildup that block water flow.
- Clearing line obstructions: Hiring a licensed drain cleaning service ensures that subsurface drain runs, internal channels, and exterior lines are hydro-jetted clear of silt, mineral scale, and intrusive tree roots.
- Interior perimeter trenching: Where external weeping systems have degraded, excavate the concrete slab along the perimeter footing, lay perforated drainage pipe in a washed-stone envelope, and seal the trench with fresh concrete.
- Sump basin redundancy: Install a dual-pump sump basin with a dedicated primary pump, a secondary float switch, and a marine battery backup unit capable of maintaining drainage during storm-related power interruptions.
Pour High-Flow Self-Leveling Underlayments Across Uneven Slabs
Basement concrete slabs in residential builds rarely meet the flatness tolerances needed for contemporary finishes. Soil settling, crude hand-troweling, and seasonal ground movement create ridges and low depressions across the floor. Placing rigid flooring over uneven concrete leads to hollow sensations underfoot, cracked plank locking mechanisms, and early material wear along walking paths.
- Map floor elevations: Run a rotary laser level across the entire floor footprint to spot high spots that require mechanical grinding and low pockets needing cementitious underlayment fills.
- Remediate structural slab settling: If significant voiding or ground settling has dropped parts of the slab, partnering with local concrete companies provides access to mudjacking, polyurethane foam leveling, or new ready-mix pours to restore a stable horizontal plane.
- Mechanical surface preparation: Clean the concrete with a shot-blaster or diamond grinder to remove old paint, curing compounds, and adhesives while opening the concrete pores for a solid mechanical bond.
- Apply self-leveling cementitious mixtures: Coat the prepared concrete with a high-tack primer before pouring a polymer-modified self-leveling compound, spreading the liquid with a gauge rake and spiked roller to release air bubbles and form an even surface plane.
Apply Multi-Coat Moisture-Vapor Barriers and Decorative Resins

Even visually dry concrete continuously emits invisible moisture vapor via capillary pull. When flooring is laid over concrete without proper vapor sealing, trapped moisture condenses into water droplets, promoting mold growth beneath subfloor membranes and rotting structural sill plates.
- Test baseline vapor transmission: Conduct calcium chloride or relative humidity probe testing to measure the moisture vapor emission rate migrating through the slab matrix before choosing your floor system.
- Profile the substrate: Grind the concrete to an appropriate surface profile to ensure deep mechanical bonding for protective liquid coatings and vapor-retarding membranes.
- Install resinous moisture barriers: Laying down a commercial epoxy flooring system creates an impermeable, monolithic moisture barrier that seals against liquid water, stops damp smells, and stands up to heavy residential use.
- Integrate radiant floor heating: Combine seamless resinous finishes with ultra-thin electric radiant heating elements installed over an uncoupling barrier, producing uniform and efficient warmth across cold subterranean surfaces.
Replace Center Columns with Recessed Steel Beams and Engineered Headers
Traditional residential construction places a row of adjustable teleposts or steel lally columns along the center of the basement to hold up overhead floor joists. While functional, these vertical supports disrupt open-concept architectural designs, dividing entertainment rooms and obstructing clear sightlines. Removing these posts requires transferring overhead loads to long, clear-span beams.
- Calculate overhead tributary loads: A licensed structural engineer must determine the cumulative dead and live loads borne by existing posts, taking into account second-floor load-bearing walls, heavy kitchen cabinetry, and roof loads.
- Size recessed steel structural members: Replace low-hanging drop girders by installing a wide-flange steel beam or multi-ply engineered wood header recessed flush into the joist cavity, using heavy-duty joist hangers to secure the joists to the beam web.
- Pour reinforced concrete pad footings: Transferring clear-span loads focuses significant downward weight onto the terminal ends of the beam. Crew members must cut the floor slab, dig down to stable undisturbed subsoil, and pour reinforced concrete pads with rebar grids.
- Retain specialized structural builders: Undertaking post removal safely requires experienced basement remodelers who can erect temporary load-bearing shoring walls, operate synchronized hydraulic bottle jacks without damaging upper-story plaster, and pull municipal permits.
Relocate Central Feeders to Flush-Mounted Enclosures
Electrical systems in older homes often feature surface-mounted metal conduit, low-hanging junction boxes, and distribution panels placed in central, conspicuous locations. Updating and repositioning this electrical framework is essential for both spatial flow and modern electrical safety.
- Maintain required working clearances: Building codes require that electrical distribution panels remain fully accessible, demanding a minimum clearance width of thirty inches, a forward depth of thirty-six inches, and clear headroom of six and a half feet.
- Upgrade main service capacity: Replacing an aging distribution setup with modern electrical panels rated at 200 amps ensures sufficient circuit capacity for basement mini-splits, entertainment systems, kitchen appliances, and dedicated lighting circuits.
- Route wiring through joist passages: Drill wiring runs through the center third of floor joists instead of fastening cabling to the bottom edges, preserving maximum overhead space for drywall installation and flush lighting fixtures.
Transition to Tankless Wall-Mounted Combi Units to Free Up Floor Footprint
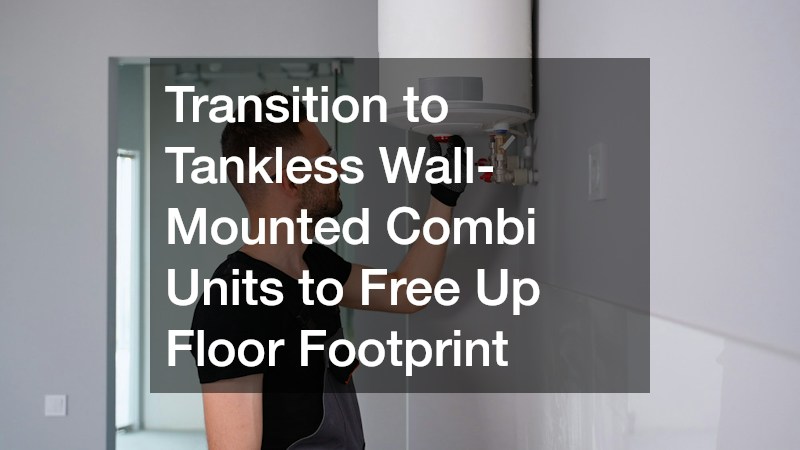
Traditional mechanical rooms occupy substantial basement square footage. Centrally placed draft furnaces, bulky water storage tanks, and large cast-iron boilers frequently take up thirty to fifty square feet of usable room in the center of the floor plan. Modern hydronic heating designs allow homeowners to reclaim that space entirely.
- Switch to dual-purpose compact hardware: Replace separate water heaters and standing boilers with a compact, wall-hung condensing combination unit mounted against an exterior rim joist to supply hydronic room heating and continuous domestic hot water simultaneously.
- Work with certified hydronic technicians: Hiring a dedicated boiler replacement service ensures proper plumbing of closed heating loops, variable-speed pumps, and side-wall venting pipes in full compliance with local safety codes and draft standards.
- Eliminate outdated masonry chimney stacks: Because modern condensing heating equipment vents horizontally through exterior walls using PVC or polypropylene pipe, unused brick chimney chases can be removed to free up floor space across all levels.
- Decouple equipment acoustics: Mount all wall-hung machinery on vibration-dampening brackets and rubber unistrut channels to prevent mechanical hums from vibrating through framing into upper living areas.
Reconfigure Return Plenums and Verify Heat Exchanger Integrity
Remodeling a basement provides an opportunity to inspect central forced-air equipment, reconfigure sheet metal duct plenums, and eliminate carbon monoxide risks before framing permanent walls around utility spaces.
- Inspect and service heating equipment: Prior to enclosing utility rooms, bring in reliable furnace repair companies to clean burner assemblies, adjust blower speeds, and test the heat exchanger for hairline cracks that could leak combustion gases into the living space.
- Compact sheet metal plenums: Rebuild bulky return drops into sleek, space-saving vertical plenums equipped with high-efficiency media air filters positioned neatly beside the heating cabinet.
- Build sound-insulated utility enclosures: Frame mechanical closets with staggered stud walls, fill the cavities with sound-dampening mineral wool insulation, and hang fire-rated drywall paired with a solid-core door to isolate mechanical operating noise from finished rooms.
Tuck Duct Trunks Between Floor Joists to Maximize Headroom
One of the main design challenges in basement remodeling is the network of sheet-metal ducts, waste pipes, and utility runs suspended below joists, creating low clearance points and awkward visual breaks. Strategic structural adjustments can conceal these elements effectively.
- Use low-profile duct shapes: Swap large round metal ductwork for flat oval or rectangular supply ducts that fit neatly within existing floor joist cavities, preserving continuous ceiling heights across main recreation spaces.
- Seal transverse duct joints: Partner with certified HVAC contractors to seal all sheet metal connections and transverse seams with fiber-reinforced mastic compound, preventing conditioned air leaks inside closed ceiling cavities where tape adhesives deteriorate under humidity.
- Design architectural ceiling soffits: When primary supply trunks must run below joist bays, build clean, rectangular drywall soffits with integrated indirect LED cove lighting, turning structural drops into attractive architectural details.
- Insulate distribution ducts: Wrap supply and return trunks in foil-faced duct wrap to quiet airflow noises and stop condensation from forming on cool metal surfaces during warm summer months.
Install Dedicated Inline Dampers and Low-Wall Return Grilles

Basements commonly suffer from thermal stratification. Because cool air is heavier than warm air, lower-level living spaces often feel cold and drafty during heating seasons, even when the rest of the house remains warm. Simply routing overhead supply vents downward does not fix the balance of air.
- Install low-wall cold air returns: Pull cold, heavy air off the basement floor by installing return grilles positioned near the baseboard, drawing stagnant air back into the ventilation system to encourage warm air circulation down into living zones.
- Correct heating airflow balance: Addressing cold rooms often involves engaging technicians for local heating repair who can install motorized dampers, balance air distribution between floors, or add inline booster fans to long duct runs to deliver proper airflow volume.
- Add supplemental zoned heating: If the main heating system lacks the capacity to heat the added space evenly, install an independent ductless heat pump system to deliver dedicated, efficient temperature control without requiring additional ductwork.
Remodeling a basement into an inviting, high-performance living area is a demanding structural endeavor that requires thorough preparation, engineering knowledge, and meticulous craftsmanship. While it is natural to look forward to aesthetic selections like paint colors, flooring patterns, custom millwork, and entertainment setups, the lasting comfort and durability of the space depend on the structural and mechanical systems hidden behind the walls and underneath the floor.
By stabilizing foundation walls, managing groundwater intrusion, pouring level and moisture-resistant subfloors, replacing cumbersome support posts with clear-span beams, and streamlining mechanical heating and ventilation equipment, you protect your home against water issues, poor air circulation, and compromised layouts. A thoughtfully engineered basement renovation provides a quiet, dry, and energy-efficient living environment that feels just as warm and welcoming as any above-ground room. Focusing on structural integrity from the very beginning ensures that your finished basement delivers functionality, safety, and lasting property value for years to come.